Initial Ideas

In keeping with the romantic comedy genre I have planned a rough plot for my idea.

DownloadedFile

My main character is a man in his 20’s; he’s had no luck with women for most of his life, although he has dated before, a recent relationship ended terribly. He finally gets sick of this and gives fate an ultimatum – he will go on 400 more dates and if he still can’t find love he vows to never date again. The film shows various clips from his dates. I’m planning on editing it in non-chronological order.

My Chosen Genre

Comedy

I have chosen the comedy genre for my opening sequence. I haven’t chosen what sub-genre I will do yet as I think this will become obvious when I decide on a plot. My reason for choosing this genre is that the two genres I thought would be the easiest for me were horror or comedy however, as I said I think horror can become really cliché, and if I can ‘poke fun’ at the horror genre I would enjoy that much more.

Picture19

Genre Battle

Horror:

Conventions:

horror

1.   The horror genre is virtually always hybridised as there are so many different ways to scare people. Horror is split into sub-genres. A few examples are:

 Physiological Horror, Slasher, Gothic Horror, Science-Fiction Horror.

2.   Morbidity and death are always involved in the plot.

3.   With small independent films there is normally some sort of hand-held sequence from the point of view of the protagonist running away from the antagonist. Shots from the point of view of the camera are perfect for low budget films; it also effectively makes the audience feel more involved in the action and therefore more scared. Horrors are meant to horrify.

My Feelings on The Genre:

I think my problem with the horror genre for this task is that when you’re working with no budget and average recording equipment the classic thing to make people scared is show the film through the perspective of a average hand held camera; for me this seems very cliché and overdone. I’m not discrediting ‘hand held horrors’, they can be very effective, for example the films Cloverfield and The Blair Witch Project. What I’m saying is that I want me opening sequence idea to be slightly original and so I’m not sure if horror is the best choice.

Thriller:

V for Vendeta

Conventions:

  1. There is normally some sort of mystery that needs to be solved by the protagonist.
  2. Very tense scenes. It’s meant to ‘thrill’ so you are supposed to be on the edge of your seat wanting to know what is about to happen, in suspense.

My Feelings on The Genre:

As one of my favorite genres I know that I would enjoy making a thriller opening sequence, however I think that it might be a little difficult to get across that it is part of the thriller genre in just two minutes. I think if I chose to try the thriller genre I might be taking an unnecessary risk.

Social Realism:

I found this slide show on the conventions of the British Social Realism genre which I found really helpful to start me thinking about the genre practically. I cannot verify the author of the slide however it inspired me and is worth note.

Conventions:

  1. Larger world issues are usually explored in the plot through a personal story.
  2. The settings are normally real places. Not made up in a studio – they are real so that the audience can become more drawn into the plot and accept the verisimilitude of the situation. This convention also relates to how the genre is normally explored by independent film whose budgets are low, it’s helpful not to have to make expensive Hollywood Sets if it is not necessary.
  3. Lots of wide shots that continue to establish the real setting.

My Feelings on The Genre:

Although this genre is simpler to explore within the constraints (I have to film with basically no budget and student equipment) I’m not sure if the social realism genre is something I would want to explore within an opening sequence as it’s not really a genre that I personally enjoy. I also think that it is easy to become very cliché within the genre.

Comedy:

Comedy - Hot Fuz

Conventions:

  1. Plot line has obviously got to be funny.Movie poster for "Scary Movie".jpg
  2. Depending on the target audience the main setting of the comedy genre changes. Normally it is set in places generic to the audience. E.g. high school for teenagers, place of work and bars for adults.
  3. Conventions really do depend on the type of comedy. Like horror there are many sub-genres of comedy as there are lots of ways to be funny. Some examples are:

Spoof, Romantic Comedy, Black Comedy, Mockumentary.

My Feelings on The Genre:

I think the comedy genre is something I might want to attempt as it might be relatively easy to make the conventions clear in my opening sequence. Most of what I would need to do would just be to make people laugh.


Applying the 4 Continuity Techniques

180 Degree Rule

I followed the 180 Degree rule thought the piece. I stayed on one side of the metaphorical line across the set when I filmed. I don’t think I could have improved my use of this technique. The effect of following the 180 Degree Rule is that the spacial relationship of objects and characters on stage appear to be the same, nothing has moved. The audience can then perceive the film as more realistic and can become further invested into the plot as they are not distracted by moving shots that do not seem to quite fit together.

Picture12 Picture11Picture10180 TwoPicture9 180 One

Shot Reverse Shot

I used various shot reverse shots throughout the conversation. Although the shot is sort of a reverse of the other I think that I could of made it better by getting more in front of both characters, so that the camera is looking at them head on not from an angle. The problem was that there was a big table between them and I couldn’t get the tripod to go short enough to get the character in the shot. Next time I will use my ‘mini’ tripod which can sit on surfaces and is still short, as well as my larger one. Because I filmed the two shots from an angle the shot reverse shot doesn’t look as professional. Also the two characters are not centred in the same way. For the boy his neck is in the centre, but the girls face is the center of the second shot. Because they don’t match up as well the video begins to lose some of its fluidity and it again looks less professional.

Shot Reverse Shot Part One Shot Reverse Shot Part Two

You can see from my animatic that I had planned to have the shots at less of an angle. At any rate the shots still exemplify the shot reverse shot technique, I just think that they could be improved.

Picture13 Picture14

Eyeline Match

I used one secure eyeline match and I am very happy with it. I think that the view of the phone does match the character’s eyeline and therefore I feel I adequately fulfilled the parameters of this technique. I actually held the camera in front of the character’s face so that the shots would match. My only problem with this shot does not relate to the technique itself; it is simply that the quality of the video hinders the audiences ability to read the text message, therefore the enigma code I was trying to portray is lost. One thing I thought of after editing the phone shot is that I could have made the font size on my phone larger so it was easier to read, it would have looked slightly less real, however hopefully the audience would actually be able to read the text. The effect of this eyeline match is so that the audience can read the text message the character just received. It also forces the audience to become more connected to the character, by showing his exact viewpoint, so they can begin to develop a better understanding of him.

Eyeline Match Part Two Eyeline Match Part One

Picture16 Picture15

Action Match

My video included various action matches and I tried to make them fit smoothly into the video. For the most part I think I did this successfully, my favorite action match was when the camera follows Elliott walking into the kitchen and then sitting on his seat (0.50 – 0.56):

Picture17 Picture18

I think this shot flows the most smoothly and I don’t think the audience would notice that the shot had changed. I think the success of this action match was mostly due to its subtlety. The shot only changes angle slightly, and then a ‘wipe’ transition is almost created as Elliott walks in front of the shot. If this technique is used effectively the audience should not notice that the shot has changed, it should not distract them from the storyline at all. I think this shot fulfills that description.

Preliminary Task

What I feel went well:

My use of the four media techniques:

1. 180 Degree Rule: I followed the 180 Degree rule thoughout the piece.

180 One 180 Two
2. Shot Reverse shot: I used various shot reverse shots throughout the conversation.

Shot Reverse Shot Part One Shot Reverse Shot Part Two
3. Eyeline Match: I used one secure eyeline match:

 Eyeline Match Part Two Eyeline Match Part One

4. Action Match: My video included various action matches and I tried to make them fit smoothly into the sequence.

Picture5 Picture6

My ability to follow the narative set out in the brief.

  • My character did open a door walk, across the room, sit opposite a second character, and exchange two sentances with said character.

Changes I made since my animatic:

  1. I slightly adjusted the order of shots so that the boy says ‘Rosie?’ ‘Yes?’ before the long wait for him to speak rather than after. I did this because I thought that it made the sequence flow better, and I didn’t want things to ‘drag’ on for too long,
  2. I changed some of the music (1.11) simply because I found a better piece to use that fitted the shots more. The new music was more dramatic which added to the humor.

What I need to improve on (and what I can do next time):

  1. To save time I had to export my video in quite a low quality format. Unfortunately this meant that the eyeline match of the boy looking at his phone is too pixelated to read. For this particular project this is okay but next time, for my opening sequence, I definitely need to upload the video in a better quality.
  2. I commented on 4 ways to improve in my ‘filming process’ blog post however I will reiterate:

Firstly with sound I said I should  I should try using another recording device synchronously near the actors while filming. The recording devise being my smartphone’s built in voice recorder. This will help to improve the sound quality and audibility in my next video.
Also I mentioned the area of actors. Next time I would really like people with some acting experience to do all the acting. My performing background means I can demonstrate what I want, however considering the added difficulty of operating the camera and directing the scene whilst also staring in front of it, I always really need to be behind the camera.
Where camera movement is concerned I think that I should of had some sort of movement, like a pan, if only to demonstrate that it’s something I’m capable of. It will also add variety and interest to the piece.
Continuity wasn’t something I specifically need to improve on, I just know that I have to keep thinking about it, and always being on my toes about remembering how things were in the previous shot.

3. Finally, to add a further point to improve upon:

5. Importing: When putting video files from my video camera (sony handycam hdr-cx190e) I need to bring in the camera and put them straight onto the mac computers from there as otherwise it ends up in the wrong format. It is very time consuming to have to convert all the footage so I MUST remember to do this next time.

Please answer the poll below so I can work to improve my future work, and identify any mistakes I made. Thank you.

The results of the poll so far is that 80% of people don’t think that there are any other continutiy errors in my sequence, I think this means that I successfuly followed the rules of continuity.

The Filming Process – Preliminary Task

What I feel went well:

1. Lighting: Media blog - Filming Process - Light

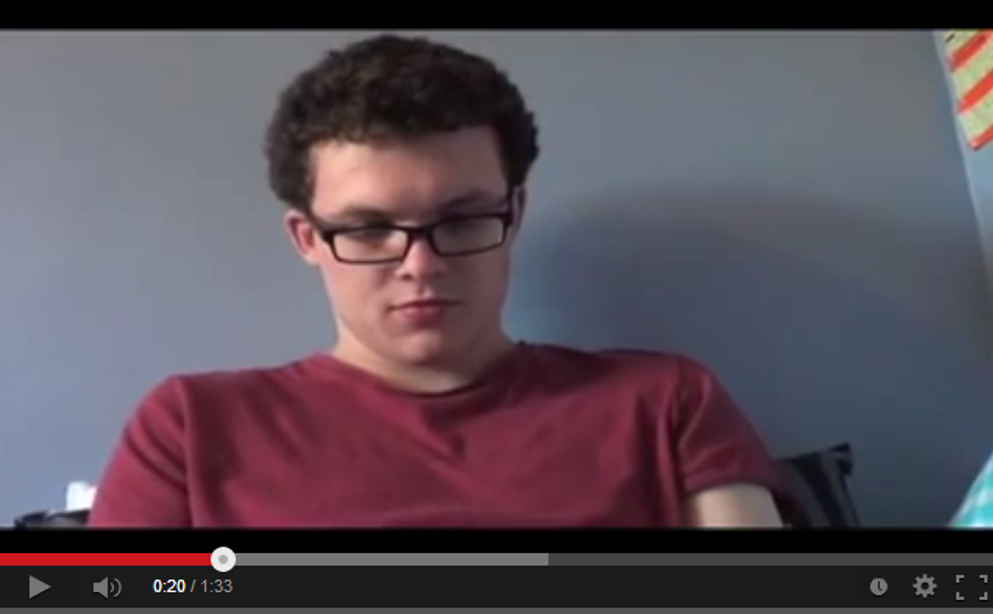
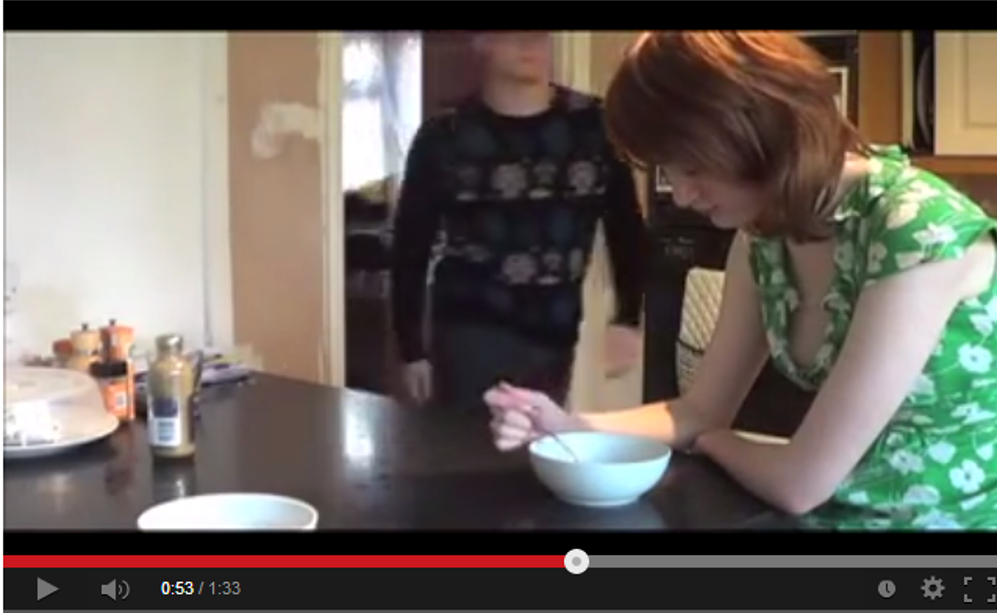
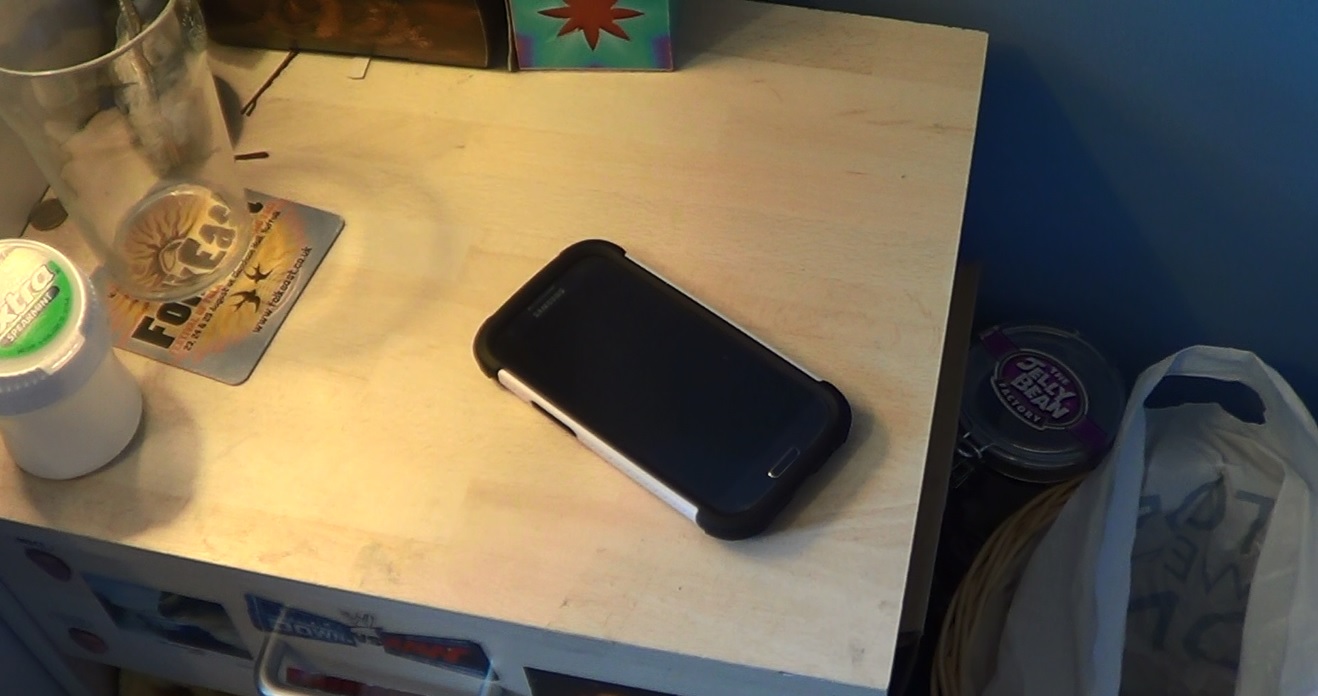
For the shots in the bedroom I wanted the light to appear natural because the connotations of them are supposed to be more comfortable than the later shots. I originally thought that it would therefore be a good idea to have natural lighting. However as I mentioned in my ‘Preliminary Task Animatic’ post the British weather does not always produce the most warm lighting. To make these shots look warmer I decided to use other light sources for example my main light and side lamp. As I said both of which have ‘warm orangey’ bulbs. When I began to film I realised that the lighting still was not enough so I went around the house and borrowed other light sources – my fathers bed side lights. I then positioned all of these lights outside of the shot and filmed. The effect still isn’t as warm as I would like but it definitely looks natural in the long shots (see bellow- right). However in my close up high angle shot of the phone (see bellow – left) you can see that there is definitely artificial light source, which you couldn’t before, which means there is a slight continuity error there.

Picture 1Blog post filming proscess ohone lighting


2. The Brief:

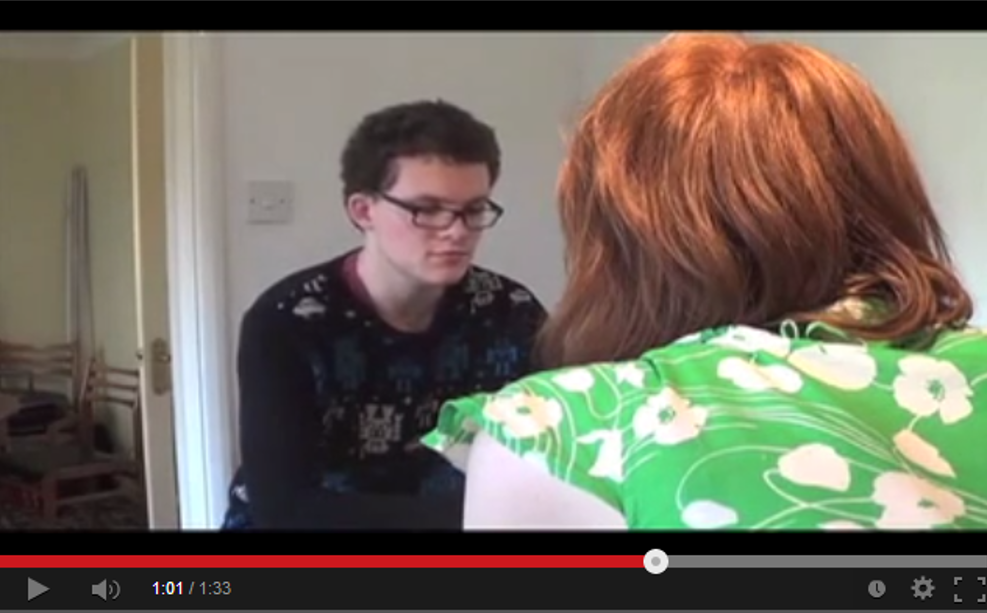
 Overall I believe the filming process was a success in the context that I followed all the rules and the specifications laid out in the brief. Considering that I followed my animatic and storyboard there was no way I could not follow the brief as they both adhered to it. The only risk was that I might mess up the 180 degree rule when filming practically. I confess that when I first began the over the shoulder shots I filmed from the wrong side. However because I kept checking my storyboard and playing back I quickly realised what had happened and re-filmed that specific shot.

180 bad180

What I need to improve on (and what I can do next time):

1. Sound: 

As is often the problem with small handheld cameras the sound quality is not brilliant, by this I mean that it sometimes becomes difficult to hear the dialogue. One thing that my tutor suggested was that I should try using another recording device synchronously near the actors while filming. This removes the difficulty of trying to get inexperienced actors do dub over the original footage, it can be very tricky to get this perfect. It also means that you can make the specific dialogue louder. Most smart phones (mine included) have a perfectly acceptable recording system on them so I wouldn’t have to buy any recording equipment. Next time I definitely plan to try this technique out, hopefully during my opening sequence.

Recording for blog pic

2. Actors: 

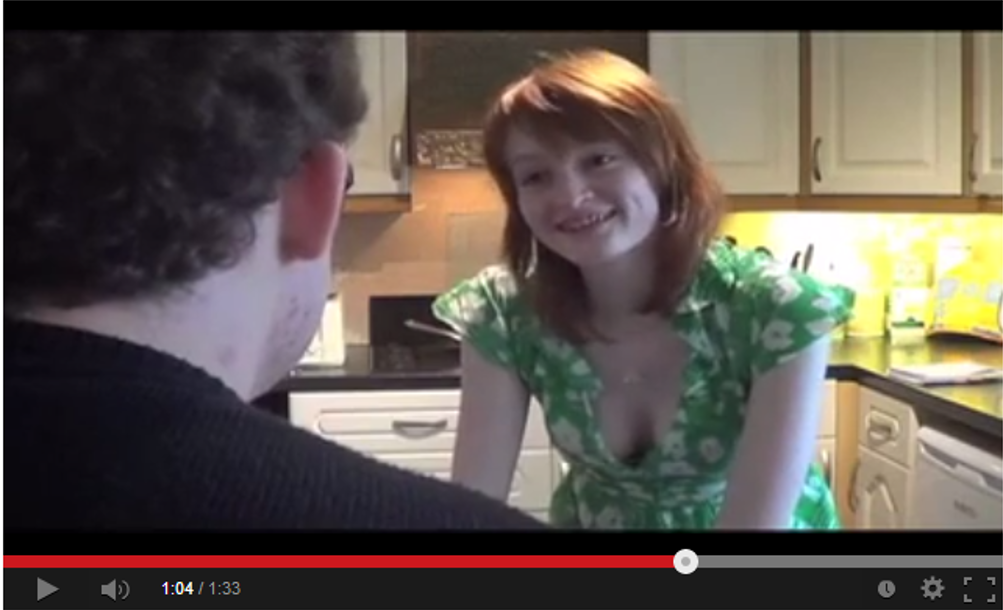
The ‘actors’ in my video were me and my friend Elliott, I have acting experience he does not. The problem with having myself in the film was that I had to keep checking the recording afterwards to make sure everything had worked correctly; I was able to flip the camera screen in my direction but it just made the whole filming process unnecessarily longer. I would have liked to have someone else play my part however I could not find someone who was able to do it when I needed. This is not an excuse, I’m sure there was something I could have done to find someone but I was not able to.

camera for blog

Considering the added difficulty (which I don’t think effected the sequence quality – I was able to overcome it) next time I would really like people with some acting experience to do all the acting. My performing background means I can demonstrate what I want, however I always really need to be behind the camera.

3. Movement:

After I finished filming the sequence I thought about all the different shot types I used and I know I had a variety. To name a few: Wide shot, Mid Shot, Extreme Close Up, Over the Shoulder, Point Of view… However all of these shots were static, stationary on my tripod. I did not pan for any of them. I’m don’t think that every sequence has to have camera movement, especially for such a short, simple sequence as this, but retrospectively I think that I should of had some sort of movement, like a pan, if only to demonstrate that it’s something I’m capable of.

4. Continuity:

I believe that my continuity throughout the sequence was (that I know of, I will make sure to ask people after uploading the finished video to check for any errors)  good. The only thing I found was, as I mentioned, a small lighting error. This proves that I always have to be alert of mistakes to be made, and keep reviewing the recording while filming to check for any mistakes. Despite this small lapse in concentration, continuity was constantly on my mind; I even went as far as forbidding my actor from touching his shirt as it would cause the creases in it to move.

crease shirt

Preliminary Task Animatic

The Brief

I think my animatic successfully followed the brief. I presented all of the four techniques within it and my character does indeed walk across a room sit down opposite from my other character and exchange at least two sentences. My characters did in fact exchange three sentences but we were told we could have a certain introduction and ending as long as the brief was followed somewhere in the plot. Allowing myself three short sentences just meant that I could develop a slightly more complex plot.

I believe that I used sound to effectively portray certain actions, for example the shot of the phone slamming down onto the bedside table did not look very much like a ‘slam’ but when I added the sound effect of a small bang it made the action far more clear. Additionally when I layered different sounds, for example the sound effect of crickets paired with the sound of water drops, it made a stereotypically ‘awkward’ ambient sound which builds the ‘mock’ tension and increases the humour. For most of the sequence the comedy is illustrated through the use of dramatic conventions for a non-dramatic situation. I think that my use of sound in my animatic is well suited for my chosen genre, comedy, and helps to further the joke.

Changes I will make next time I make an animatic, and what I will change when I actually film and edit this one:

  1. Next time I make an animatic and storyboard I will make sure that I don’t draw speech bubbles; the drawings should only show what can be seen, you cannot see speech, that’s what the dialogue box is for.
  2. I will make some shots shorter so that things don’t linger too long once action or dialogue has finished as the sequence then starts to feel disjointed and doesn’t flow. For example when the characters exchange the sentences ‘Rosie?’ and ‘Yeah?’ the shots linger too long with both characters and there is a pause between the two sentences which should not be there. It does seem disjointed and when I edit the real thing I will make sure the cuts to different shots are better timed.
  3. Also I will make the first shot a little longer so the audience has time to settle in with the character and setting. It’s an establishing shot and I think that if I rush it the audience will not have time to register the character as the main one.
  4. Similarly I need to make the eye line match at the start, where the audience is given the chance to read the text message, longer as it is slightly too short to read comfortably and the shot is quite key to the plot as it creates an enigma code of what and who the boy must tell.

Things not shown in my animatic or storyboard (Lighting):

lamp

I want there to be harsh lighting in the kitchen to convey how the boy feels uncomfortable and, while he’s waiting to confess that he’s an alien, he feels almost as if he is in a police interview room, or perhaps under a spot light on stage being examined. My kitchen has 4 mini spot lights which are movable, I plan to focus most of them on the boy when filming to create this effect.

The lighting in his room will be far warmer to connote that he is more comfortable there. I intend to open the curtains so that most of the lighting is daylight however, since the ‘warm British weather’ doesn’t always convey a pleasant atmosphere, I will turn on my bedside lamp and my main light out of shot, both of which have orange tinted bulbs. I hope this will make the lighting warmer, if it doesn’t I will have to edit the shot with an effect so that it does.

The Storyboarding Process

Shot 12: Closer View of the stairs through the door. Close Up shotdiegetic game music plays quietly in the background, the girl shouts “Tea’s ready. Can you come town?”. I chose to use this shot because the door being slightly ajar so that the audience is definitely looking out of the room connotes how the boy is hiding in his room, and the girl downstairs is intruding. It also establishes the setting of the house outside of the boy’s room. The boy could have been in a flat or somewhere else but now as the audience we know he is in the his room upstairs in his house. We know that we are looking out of the same room because quietly in the background the ambient atmospheric sound of the game can be heard.

20131013_141128

Shot 20: Action match of boy walking downstairs then to the left it will be a long shot with a low angle. For obvious reasons a low angle shot gives the boy power as the audience is forced to look up at him, I wanted this to connote that he has achieve a level of confidence to do what he needs to do tell ‘her’ something, I use this to hook the audience as- at this point the audience do not know what it is. This shot is the second part of an action match of the boy making his decent down the stairs. I used quite a few action matches to move through his journey as it is not too important to the storyline. Also showing lots of angles of the same character signifies to the audience that this character is the main one, the scene is following him.

20131013_141146

Shot 22: Boy sits down. A two shot or establishing shot is used. The dialogue is: Boys says “Hey”, girl says “Hi”. I used this shot to establish the positioning of the characters and the setting they are in, the dinner table. Because they are separated by a large table the atmosphere becomes awkward, and this is only increased by them exchanging merely one word to eachother. The awkwardness of the situation builds the tension which makes the punch line of the sequence even funnier.

20131013_141201

Shot 35: Very quick extreme close up shot of the boy’s eyes. And shot 38: Very quick extreme close up shot of the girl’s nose. Again these shots are meant to increase tension and allow the audience to process the character’s emotions. The quick succession of shots 34-38 is also to build tension and also, because it is a dramatic convention, it builds the comedy because the issues addressed in the plot are really not particularly dramatic. Furthermore I wanted irrelevant facial features to add to the humour as a random shot of the girl’s nose or ear does not illustrate her emotions, I was just trying to create a parody of the classic technique.

20131013_14125420131013_141306


My Interpretation of the Preliminary Task Brief

The brief was to create a video of no less than 20 shots depicting the four techniques explored in the preliminary task:

Action Match, 180 degree Rule, Shot Reverse Shot and Eye Line Match

With the story line following this narrative at some point:

“A character opens a door, walks across a room, sits down opposite another character and exchanges two sentences.”

I have decided to set the plot around a boy having to tell his girlfriend something. The boy begins upstairs, playing a game on his Nintendo 3DS, he receives a text saying ‘You have to tell her today!’ He decides to ignore the text and returns to playing his game. Then his girlfriend calls up the stairs telling him to come down and have dinner. So he begrudgingly turns off the game and walks downstairs and into the kitchen. He sits opposite his girlfriend and awkwardly says ‘Hi.‘ she says ‘Hey‘ back. He then sits there looking at her trying to bring himself to say what he needs to say… He says ‘Rosie?’ The girlfriend replies ‘Yes?’. He hesitates for a while bringing himself to speak and finally confess ‘I’m an alien’. After some very dramatic extreme close up shots the girl happily says ‘I know’.

My Eye Line Match:

  1. I will do an Eye Line match of the boy looking at the phone reading the text, then a shot of the text.

My Action Match:

  1. I will do an action match of the boy leaning down to pick up his jumper, then a shot of his hand picking up the jumper.
  2. I will do an action match of the boy walking out of the bedroom and then down the stairs, 5 shots from different angles.

180 Degree Rule:

  1. I will follow the rule when filming and planning the conversation, making sure to remain on the same side of each character.

Shot reverse shot:

  1. Throughout the conversation between the boy and the girl I will use shot reverse shots as the boy looks nervous and the girl smiles.

Continuity Editing

180 Degree Rule

The 180 Degree Rule is the film maker’s basic guideline when filming. It shows the two character’s, or an object and a character’s spatial relationship within the scene. If this rule is followed correctly it insures that the characters still look like they are in the same position in relation to the world around them from different angles, the illusion of the film being real is not broken. The scene appears to flow, the character’s eye lines match, and the audience does not entirely register they are looking at the characters from another angle. If used incorrectly the characters appear to be staring off into strange places, not at each other. The audience’s involvement with the verisimilitude of the scene would be lessened

.180_degree_rule

( picture from – http://hopetp94.wordpress.com/2011/02/14/180-degree-rule-and-match-on-action/)

Shot reverse shot

A shot reverse shot is when there is a shot of a something followed by a shot of a something else, and then back to the first shot from the same angel of the original thing. This technique is mostly used to establish two characters in a conversation in a way that puts the audience in the perspective of one of the characters – a point of view shot, or an over the shoulder shot which tends to isolate the audience more as it implies they are peering over the characters shoulder rather than viewing the world through their eyes.  This shot can also be used for an object and a character, or even two objects.

Mine: 

Action Match

An Action Match or a ‘Match-on-action’ is when a continuous action is shown through the use of multiple shots. Commonly from different angles the sequence is supposed to flow smoothly; the audience should not notice the different shots, only the action. This  technique can be used to get a better view of the action so that the audience can develop a better understanding of the scene.

Mine:

Eye Line Match

An Eye Line Match is when a shot reflects what a character is looking at. For example there could be a shot of a character looking at something, then a new shot of what the character is looking at. This can obviously be used to highlight what a character is focusing on so the audience can develop a better understanding of the character because they can see their facial emotional reaction to what has been seen. Similarly it can be used to draw attention to certain things for plot purposes. For example in a movie of the detective genre certain pieces of evidence can be revealed using this technique. A shot of a detective looking down at something, then a shot of a bloodied knife lying on the ground.

Mine :